September 11, 2026
How to Change a Projector Lamp: A Step-by-Step DIY Guide
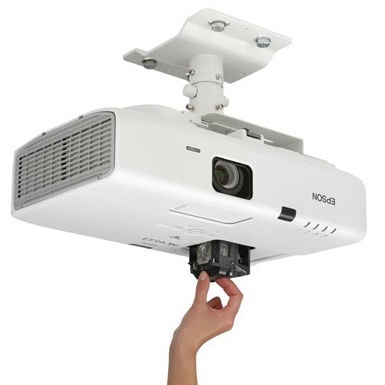
Changing a projector lamp is one of the most common maintenance tasks for any home theater or office setup. When your projector starts dimming or warning you that the bulb is near the end of its lifespan, replacing it yourself is straightforward and can save you a significant service fee.Follow these steps to safely replace your projector lamp and get your display back to full brightness.Safety & PrerequisitesBefore starting, ensure you have a standard Phillips-head screwdriver (or the specific tool required by your projector manufacturer) and a pair of clean cotton gloves.Thermal & Electrical HazardUnplug the projector from the power outlet and wait at least 40 to 60 minutes for the old lamp to cool down completely before starting. Projector bulbs operate at extremely high temperatures and carry a risk of severe burns or explosion if handled while hot.Step-by-Step Replacement Guide1.Disconnect and Cool Down:45 min.Power down the projector completely using the power button, turn off the main switch (if available), and unplug the power cord from the wall. Allow the unit to sit for at least 45 minutes to let the internal bulb cool to room temperature.2.Locate and Remove the Lamp Cover:2 min.Locate the lamp compartment cover (typically on the top or bottom panel of the projector). Use your screwdriver to loosen the screws holding the panel in place—note that these screws are often captive and will not come out completely. Lift the cover off and set it aside.3.Remove the Old Lamp Assembly:3 min.Unscrew the captive retaining screws that secure the metal lamp housing to the projector chassis. Lift the metal handle attached to the housing and carefully pull the entire assembly straight out of the compartment.4.Install the New Lamp Module:3 min.Put on clean gloves to avoid getting hand oils on the new glass bulb, which can cause hot spots and premature failure. Align the new lamp housing with the internal guide rails and push it firmly into place until it connects with the internal power socket.5.Secure the Assembly and Cover:2 min.Tighten the retaining screws on the lamp housing until snug, then reattach the outer compartment panel and tighten its screws. Verification: Ensure the outer panel sits flush with the projector chassis; most projectors feature a safety interlock switch that prevents power-on if the panel is not completely closed.6.Reset the Lamp Timer:2 min.Plug the power cord back in and power on the projector. Navigate through the internal menu system to Settings or Information and execute a Reset Lamp Timer (or Reset Lamp Hours). Verification: Check the system status menu to confirm that the lamp usage counter displays 0 hours.